With REACH, supporters are automatically given access to a self-service Donor Portal where they can log-in and access their own information.
Public instructions for supporters on how they login to the Donor Portal and cancel their account can be found here.
Key Benefits for Donors
- View & Update Contact Information
- View & Update Payment Methods
- Change Password
- Set Profile Preferences (Contact Options)
- Add Additional Info (Tell Us About Yourself, Additional Addresses, Email Addresses, and Phone Numbers)
- View a Snapshot of Donations YTD
- View a Snapshot of Total Donations
- Download & Print Contribution Statements
- View Recurring Donations
- View My Sponsorships
- View a Gift Catalog to purchase Sponsorship Gifts
- Send Conversation messages to Sponsorships
- View My Supporter Campaigns
- View My Involvement (Places and Projects)
Key Benefits for Organizations
- Organizations can choose which options are included in the Donor Portal.
- Note: Refer to our Customizing Your Donor Portal article for more information.
- Once a supporter donates or sponsors, they are automatically provided with access to the Donor Portal with their personalized information.
- Note: See our Onboarding Supporters article for more information on giving supporters initial access to their donor portal.
- Organizations can post alerts viewable to all supporters in their Donor Portal.
- Note: Check out the Supporter Alerts option under Portal Setup for more information.
- Organizations can also enable Catch Up Alerts in the Donor Portal, enabling their sponsors to be alerted when their online sponsorship payment becomes past due. Once enabled, the sponsor will be given the option to make a one-time donation to catch up on the sponsorship payment.
- Note: Refer to the Catch Up Alert in Donor Portal article to learn more.
- Organizations can add additional Supporter Custom Fields that will also be available in the Donor Portal for supporters to update in their Profile.
Video: Donor Portal Overview
Customizing Emails with First Time Login Instructions
When someone new donates or sponsors, a new supporter record is automatically created and a Donor Portal profile is created.
Supporters will receive an email when they donate (New Donation email) or when they sponsor (New Sponsorship Email).
Both emails, by default, include a login link to the Donor Portal.
We recommend you add additional instructions in those emails on how to login to the Donor Portal for the first time.
Note: This is not automatically included, as it is based on your preference as an organization.
If you choose to add additional instructions, here’s how:
- Go to Settings > Email Templates
- Next to New Sponsorship and/or New Donation, click the blue button and Edit.
- This is our recommended text to add as shown under the line “To manage your sponsorships, log in to your account.”
If you are a new supporter, you already have access to your donor portal. To login, simply click the login link above, enter your primary email address of Primary Email (click Merge Tags > Supporter > scroll and click on Primary Email) and click Sign In. You will receive an email with instructions to set your new password.

- Click Save Changes
Logging In
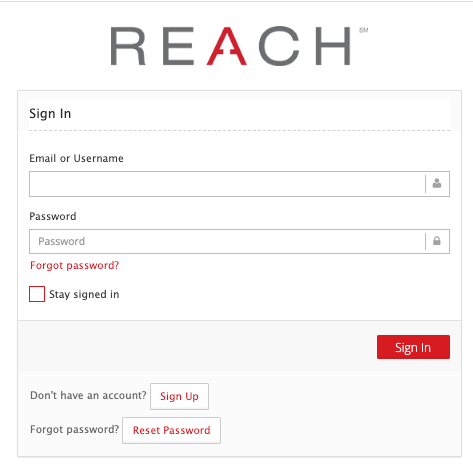
To login to the Donor Portal, supporters will need to go to your organization’s users sign-in page, which will be similar to:
https://yourorganization.reachapp.co/users/sign-in
REACH Tip: Your User’s sign in will include your organization’s logo. Your Admin’s sign in will include the word Admin underneath the logo.
They will be prompted to enter their username and password.
Notes:
- If your donor does not have a password or has forgotten their password, they can use the Forgot Password link to set up a new password using the email address on file.
- To access the portal the first time, a supporter will be required to confirm their login through the process shown here. Once logged in, supporters can manage their own information for the various areas shown below.
- In the Admin Console, the Disabled box must be unchecked to allow a supporter to log in to their Donor Portal. If the Disabled box is checked, the supporter will be unable to access their Donor Portal to view donations, sponsorships, and other details.
Donor Profile
Any information a Supporter adds here will be automatically shown in their Supporter record on the Admin side.
- List Primary Email and Username
- Include Date of Birth
- Include a Profile Photo
- Note: If a supporter’s profile photo is added, it will also be shown in the organization’s admin console
- Add to About Me Section
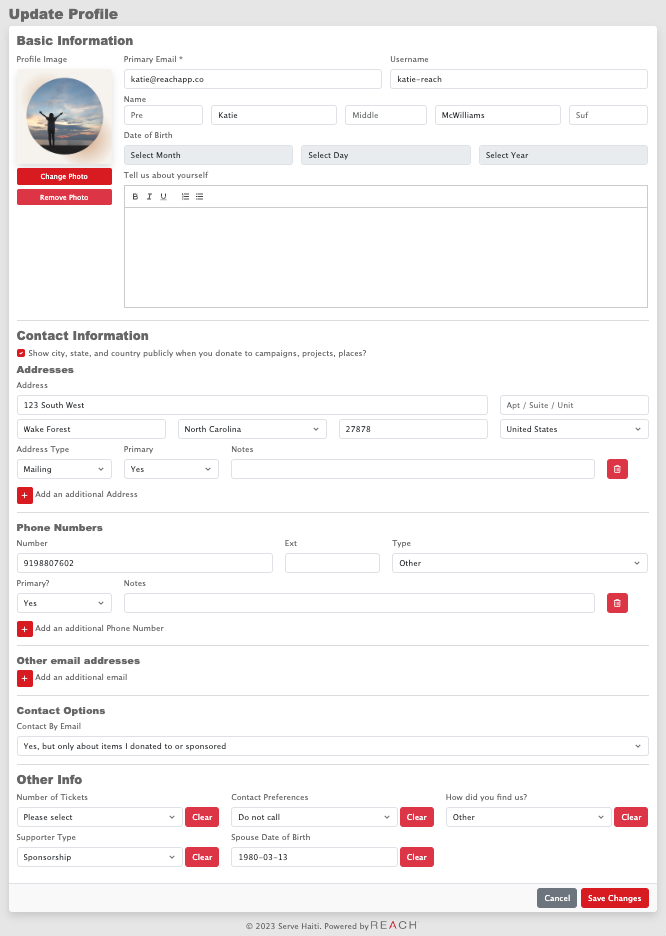
- Choose to Allow if City, State and Country will be shown publicly when the Supporter donates to a Campaign, Project or Place
- Add additional Contact Information
- Note: Only the contact information marked as Primary will be used by REACH (for emails, texts, mail merge templates, Reports, etc.). Any additional contact information is just for your record.
- Add an Address
- Add Phone Numbers
- Add additional Email Addresses
- Select Contact Options
- Add Other Info from Supporter Custom Fields such as How Did You Find Us?, Supporter Type, Spouse Date of Birth, Mail Receipt, Deposit Held
Campaigns
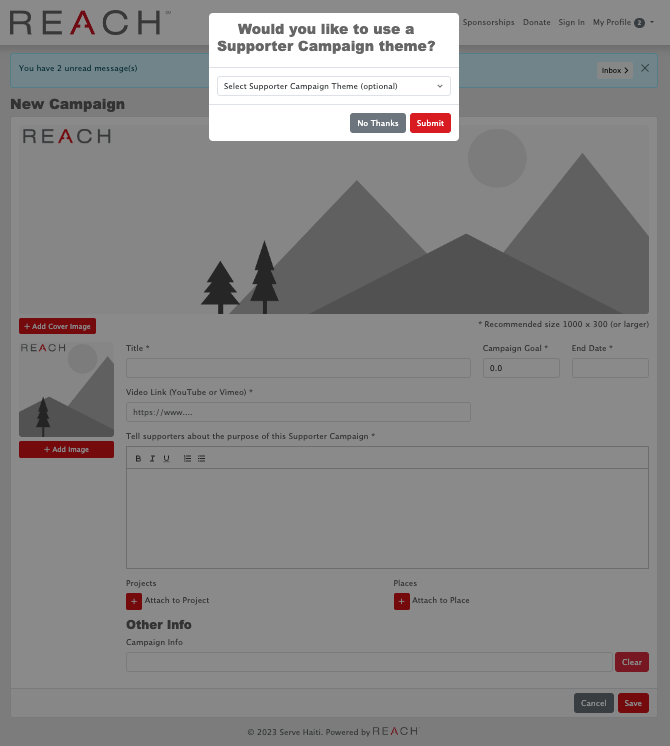
- Start, Manage and View their fundraising campaigns
Sponsorships
- From your main profile page, next to Sponsorships, click on See All to view all of your sponsorships.
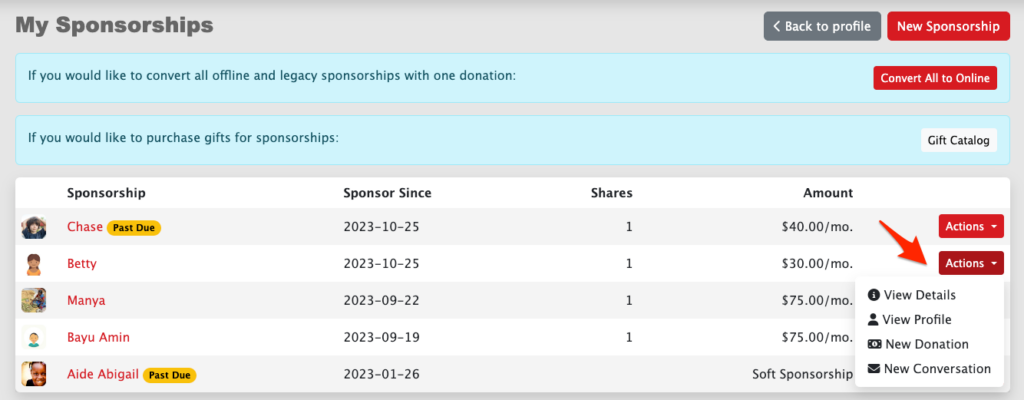
- From this page, you can:
- Convert to Online from previous sponsorship system
- Then, from the Actions button on the See All page or from the main page next to each individual sponsorship, you can:
- View Details
- View Profile
- Start a New Donation
- Send and view Conversation messages with Sponsorships
Donations
- From your main profile page, next to Recent Donations, click on See All
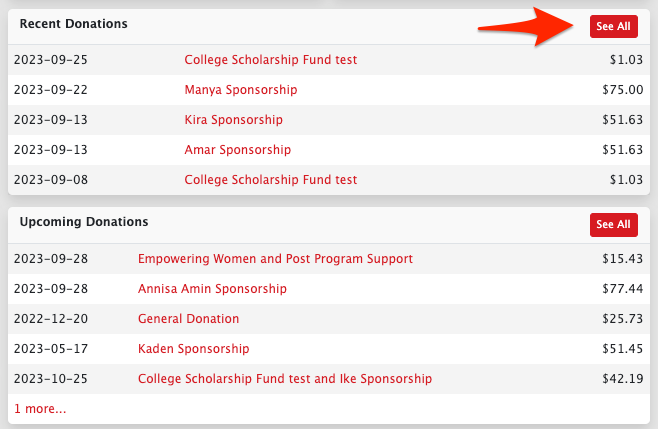
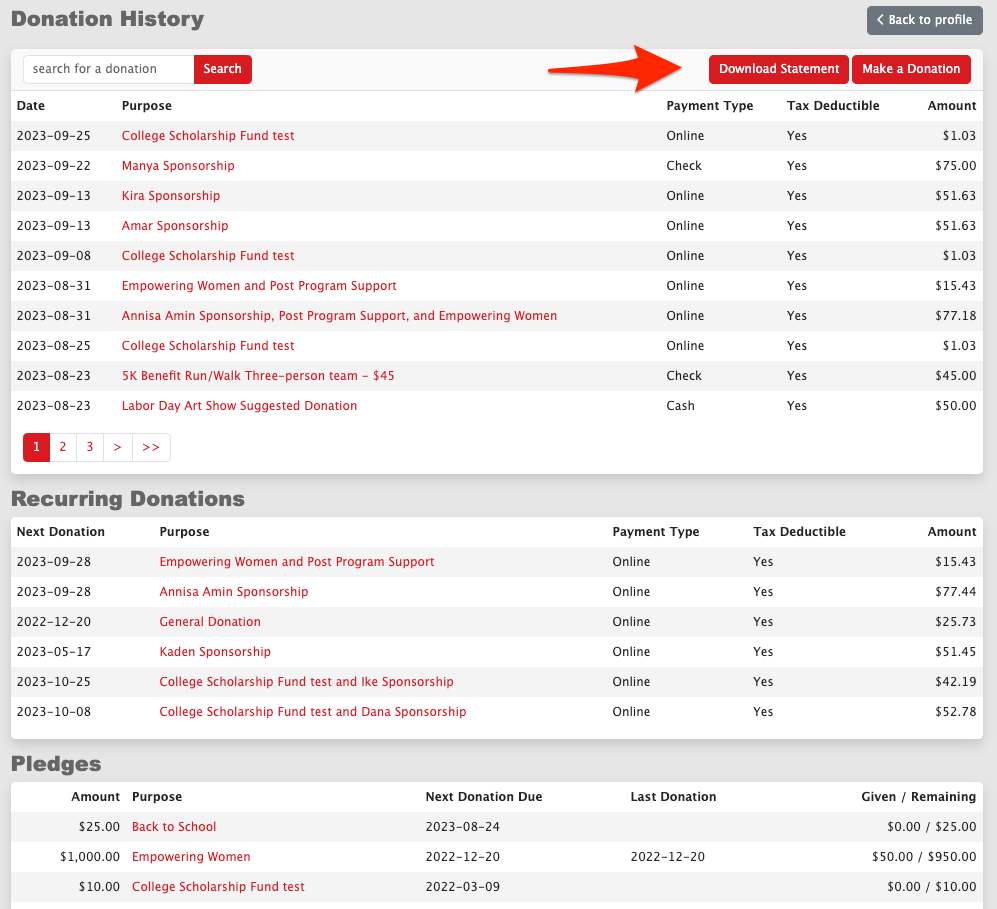
- Then, from the Donations page, you can:
- Create, Manage and View all your Donations (one-time, recurring and Pledges)
- Download and Print Contribution Statements
Updating Payment Information
From the main Profile page, supporters can store and select from multiple payment methods.
- Click on Manage Payment Methods
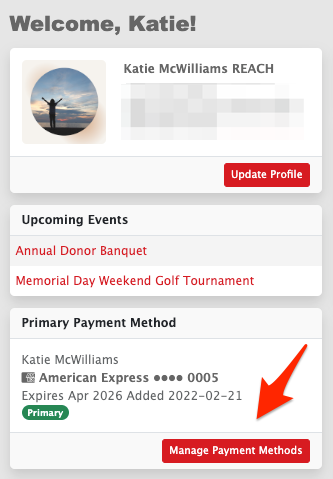
From there, you can:
- Add or Remove a Payment Method
- Mark your Primary payment method
- Mark a payment method to Use for All Recurring Donations

Note: Payment methods can be removed if it is not currently marked as primary or being used for a recurring donation. If it is, donors will first need to mark another payment as primary and/or update or cancel the recurring donation prior to removing the payment method.
Changing a Password
Donors can update their own password for their Donor Portal by going to My Profile > Change Password.

REACH Tip: Admins can also update a donor’s password by going to their supporter record in the Admin Console and clicking on Actions > Reset Password.
Canceling an Account
A supporter can cancel their account at any time from the Profile page in their Donor Portal.
Note: Providing this ability is required and cannot be disabled.
Doing so will cancel any recurring donations and/or sponsorships and will remove their personal contact information. Details of any completed transactions, including their name, donation date, amount and purpose, will remain available for your organization’s record keeping.
To do so:
- Supporters will need to login to their Donor Portal
- At the bottom of their Profile page, they will see an area entitled Cancel Account
- Click on the Cancel Account button

- A pop-up box will appear to confirm cancellation
- Click Ok
- Once they click Ok, all of their recurring donations and/or sponsorships will be canceled and their personal contact information will be removed.
Reporting
If you would like to know how many of your supporters are using your Donor Portal, you can generate a Report to gather this data.
Go to Reports > Supporters and filter your data as desired. The date displayed in the Last Sign In At field provides the last date that the supporter signed in to their Donor Portal.
If no date is displayed, the supporter has not signed in to their Donor Portal.
Watch Webinar
Watch our All About the Donor Portal Webinar to learn where your donors can log-in to access and manage their information, read updates about their sponsorships, and send and receive communication. We also detailed your customization options.
Visit our Webinars page to register for upcoming webinars.


Let’s Get Social