REACH allows you to add any number of Products to sell in your built-in online store.
This article walks you through how to add your Products and categorize them.
Here is an example product listing of a REACH branded Men’s Performance T-Shirt:

Importing your Products
If you have a spreadsheet of your Products or want to import your Products from another software, we have provided two import templates for you to do so:
- Product Import Template
- Note: Import your Products using this Template first to set up your base Products:
- Item
- Price
- Owner, if tied to an Event or Campaign
- Sponsorship Gift
- Disabled, True/False
- Inventory, number
- Position, on Products page
- Taxable, True/False
- Shipping Required, True/False
- Shipping Cost, Flat Rate or Per Item to Ship
- GL Code
- Image, file name
- Description
- Product Variant Import Template
- Note: Import your Product Variants using this template second if you have Variants to add
- Title
- Product Permalink
- Inventory, number
- Price
- Product Orders Import Template
- Note: Import your Product Orders using this template third if you have product orders to bring in
- Product Permalink
- Product Variant Permalink
- First Name
- Last Name
- Address1, postal, city, state, country
- Date
- Payment Type
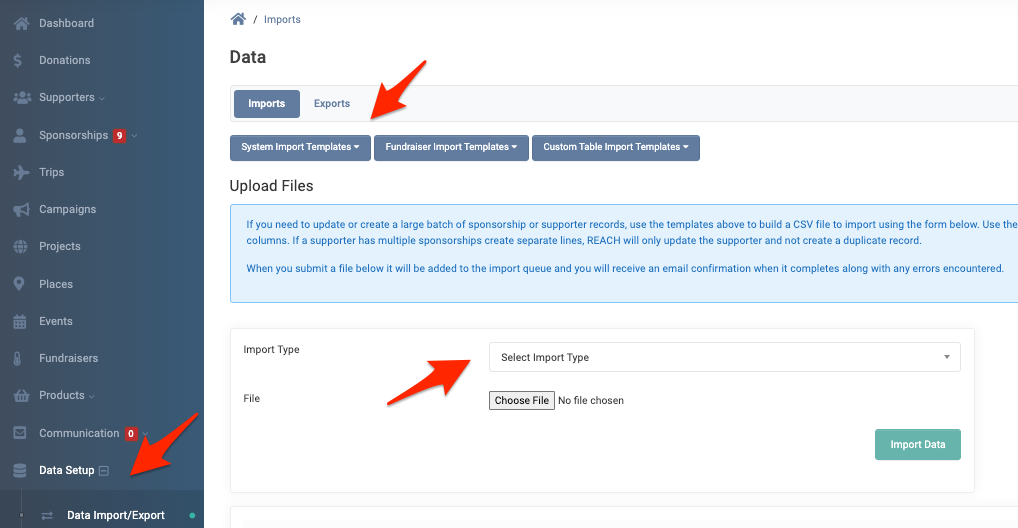
To download these Templates, go to Data Setup > Data Import/Export > Imports tab and choose them from the System Import Templates dropdown.
Once you have added the information, save the template(s) as a CSV file and import them into REACH by going back to Data Setup > Data Import/Export > Imports tab and choosing the Import Type, adding your CSV file and clicking on Import Data.
Product Images can be added to the Portal Content > Media area and then use the file name in the Import. We recommend images be square in size, 900px x 900px and under 10MB is ideal. You can also add your images individually to each Product after importing your Products.
Adding your Products Manually
- Go to Products on the left-hand side of your Admin Console
- Click the + Add A Product button

- Enter in your New Product information:

- Title
- Price
- Owner Type (None, Campaign or Event)
- Note: If you associate a Product with a Campaign or Event as its Owner, the product will only show on the campaign or event’s page.
- Recurring Subscription
- When checked, a Subscription Recurring Period option will be shown. Choose from Monthly, Quarterly or Yearly.
- Sponsorship Gift (can be purchased for sponsorships)
- If selected, you can also choose if this is a Sponsorship Gift only meant for a specific Sponsorship Type, as well if it should be listed publicly or only for sponsors to select from their donor portal.
- Check to Disable (Shown to Admins only, not Publicly)
- Set Inventory amount
- Notes: Leave empty for unlimited. Only use when product variants aren’t present. When using the REACH Themes of Quartz 2.3 or Ruby 2.3, an “Only a few left” text will be shown when your remaining inventory is 20% or less.
- Set a Position on your main Products page (higher the number, higher on the list). By default, Products are listed alphabetically.
- Select Taxable if this item is not considered tax-deductible
- Selecting Shipping Required will add the Shipping Address fields to the donation form at checkout, and the information will be included on the Donation Detail and Product Orders report.
- Set Shipping Method (cost per item or choose one you created, see Shipping Methods)
- GL Code
- Add Image (we always recommend a square 900×900 image, 10MB or less)
- Add your Variants if applicable
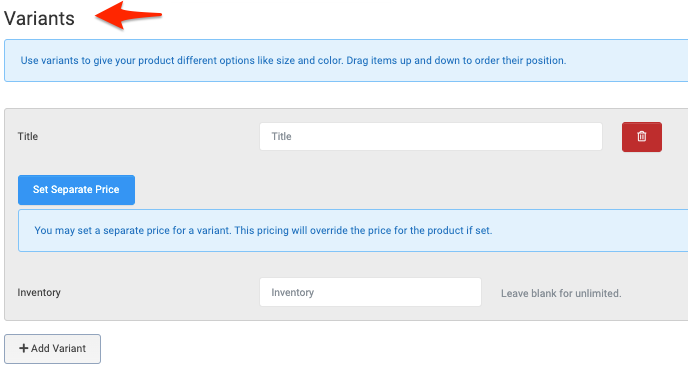
- Example Product Variants: Red T-Shirt is Product, Variants are Small, Medium, Large, X-Large, 2X, 3X.
- You can Set Separate Prices for your Variants
- Example: As often required by merchandisers, a 2X or larger shirt could be set at $2 more.
- Add Inventory amount (leave blank for unlimited)
- Note: Drag your Variants up and down to reorder their position. However, when first creating the Product or Product Variant, please save the record first prior to attempting to re-order.
- Next, add your main Product Description in the text box.

- Add Categories in the top right section (optional, see section below)
- Click Create Product or Save Changes when complete
Product Categories
Setting up Categories will allow you to organize by product type and create a list of Categories.
To Add a Category, click on Add Category from the New or Edit Product screen, give it a Title and click Create. Keep in mind the Title given will be the Title shown on the Category public menu.

Once Categories are created, and Products are assigned, supporters can click on each Category to view a listing of the the items in that category.

Note: To Remove a Category completely, go to Settings > Data Categories.
Let’s Get Social